Running a Linux distro from USB drive can be very useful, you can do almost anything just like from an installed operating system. It’s an easy way to run something on Linux or just see how Ubuntu works, the biggest disadvantage is that the USB flash drives are much slower than SSD drives. In this tutorial we will create a bootable USB drive in macOS and test it on MacBook Air.
Test environment: macOS 10.13.1
Download ISO: Ubuntu 16.04
Create the bootable USB drive (MBR/UEFI scheme)
a.) Identify the USB drive, in my example the device is /dev/disk2.
diskutil list
/dev/disk0 (internal, physical):
/dev/disk0 (internal, physical):
   #:                       TYPE NAME                    SIZE       IDENTIFIER
   0:      GUID_partition_scheme                        *121.3 GB   disk0
   1:                        EFI EFI                     209.7 MB   disk0s1
   2:                 Apple_APFS Container disk1         121.1 GB   disk0s2

/dev/disk1 (synthesized):
   #:                       TYPE NAME                    SIZE       IDENTIFIER
   0:      APFS Container Scheme -                      +121.1 GB   disk1
                                 Physical Store disk0s2
   1:                APFS Volume SSD 128GB               34.8 GB    disk1s1
   2:                APFS Volume Preboot                 18.5 MB    disk1s2
   3:                APFS Volume Recovery                520.8 MB   disk1s3
   4:                APFS Volume VM                      1.1 GB     disk1s4

/dev/disk2 (external, physical):
   #:                       TYPE NAME                    SIZE       IDENTIFIER
   0:     FDisk_partition_scheme                        *15.5 GB    disk2
   1:                 DOS_FAT_32 UBUNTU                  15.5 GB    disk2s1
b.) Erase the /dev/disk2, create one big partition /dev/disk2s1 and format as FAT32 with the label “UBUNTU”. All data on /dev/disk2 will be destroyed!
diskutil partitionDisk /dev/disk2 1 MBR FAT32 UBUNTU R
Started partitioning on disk2
Unmounting disk
Creating the partition map
Waiting for partitions to activate
Formatting disk2s1 as MS-DOS (FAT32) with name UBUNTU
512 bytes per physical sector
/dev/rdisk2s1: 30248048 sectors in 1890503 FAT32 clusters (8192 bytes/cluster)
bps=512 spc=16 res=32 nft=2 mid=0xf8 spt=32 hds=255 hid=2 drv=0x80 bsec=30277630 bspf=14770 rdcl=2 infs=1 bkbs=6
Mounting disk
Finished partitioning on disk2
/dev/disk2 (external, physical):
   #:                       TYPE NAME                    SIZE       IDENTIFIER
   0:     FDisk_partition_scheme                        *15.5 GB    disk2
   1:                 DOS_FAT_32 UBUNTU                  15.5 GB    disk2s1
c.) Mount the Ubuntu ISO image.
mkdir /Volumes/UBUNTUISO/hdiutil attach -nomount ubuntu-16.04.3-desktop-amd64.iso
/dev/disk3              Apple_partition_scheme
/dev/disk3s1            Apple_partition_map
/dev/disk3s2            Apple_HFS
mount -t cd9660 /dev/disk3 /Volumes/UBUNTUISO
d.) Copy the Ubuntu installation files to the USB drive, it might take a few minutes.
cp -Rv /Volumes/UBUNTUISO/ /Volumes/UBUNTU/
e.) Unmount the USB drive.
diskutil unmountDisk /dev/disk2
* Note The bootable USB drive will work only on systems with UEFI firmware.
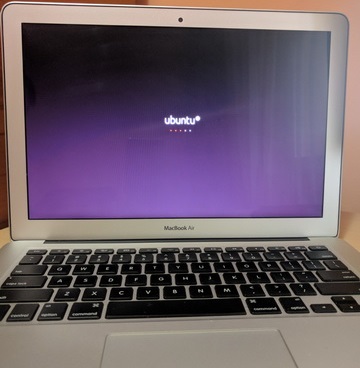
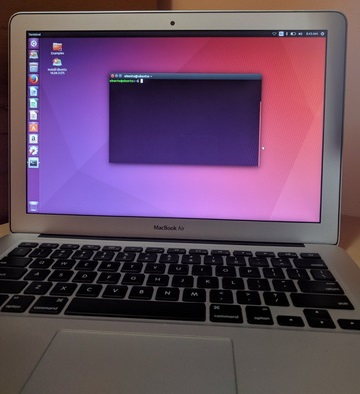
Run Ubuntu
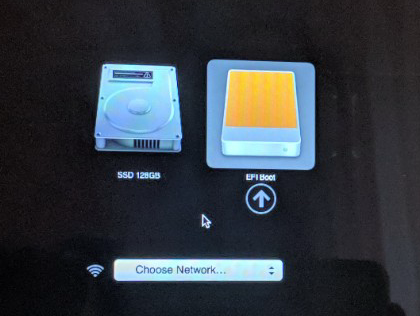
a.) Turn on your MacBook and press the Option (⌥) key, you should see the Startup Manager, which allows you to boot from other disks.
b.) Select the USB drive and press Enter.
c.) When Grub loads, select “Try Ubuntu without installing” and press Enter.